A leaking second-story walkway is a ticking clock. What starts as a small water stain on a ceiling or a drip beneath an elevated path can quickly escalate into severe dry rot, compromised structural joists, and thousands of dollars in structural repairs.
Because water is opportunistic, finding the source of a leak on a waterproofed walkway is rarely straightforward. The point where water drips is often yards away from where it actually penetrated the membrane.
Here is how professional diagnostic techs track down the source of moisture and permanently resolve the issue.
1. Tracking the Source: Advanced Leak Detection
Before picking up a hammer, you have to play detective. Water frequently travels along sloped plywood framing, joists, or utilities before revealing itself.
Visual Inspections
- Check the Perimeter Flashing: The most common failure point is the transition where the walkway meets the exterior wall or the fascia edge. Look for cracked sealant, lifting metal flashing, or gaps in the stucco line.
- Examine the Surface Membrane: Inspect urethane, cementitious, or fiberglass coatings for pinholes, blistering, hairline cracks, or bubbling.
- Assess the Drainage: Ensure that drains and scuppers are clear of debris. Standing water (ponding) degrades waterproofing membranes significantly faster than shedding water.
Active Diagnostic Testing
If visual clues aren’t enough, professionals use targeted testing methods:
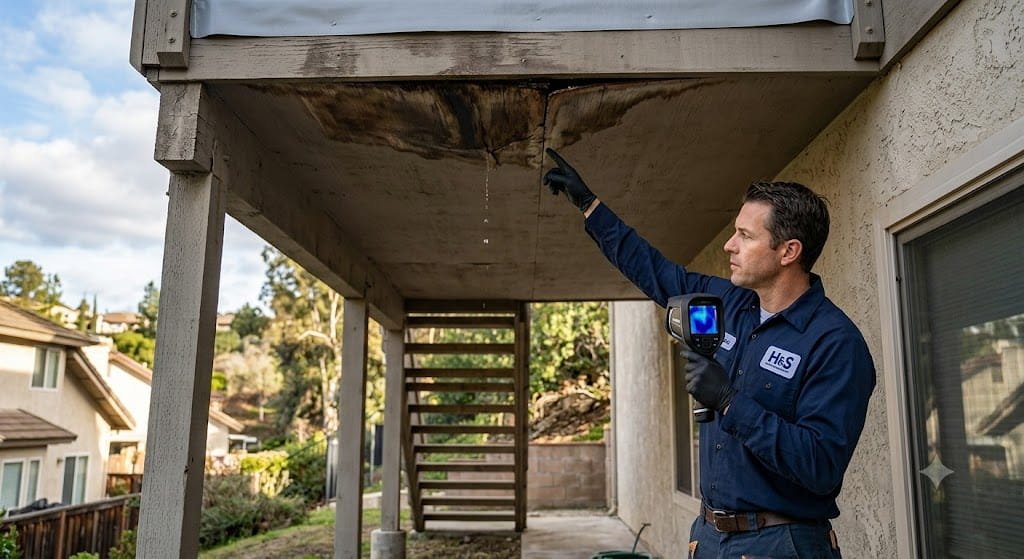
- Infrared Thermal Imaging: Thermal cameras detect temperature differentials behind walls and under walkways, pinpointing trapped moisture pockets without destructive testing.
- Isolated Flood Testing: By plugging drains and isolating specific zones of the walkway with temporary dams, we can systematically test sections of the deck to see exactly when and where a leak activates.
2. Common Culprits Behind Walkway Failures
Understanding why the walkway failed is essential to ensuring the fix lasts. The most frequent culprits include:
- Improper Sloping: Walkways must have a minimum slope (typically a 1/4-inch drop per linear foot) to direct water toward drains. Flat or sagging areas collect water that eventually forces its way through the coating.
- Poor Door Sill Flashing: Sliders and French doors opening onto second-story walkways are notorious leak points if the pan flashing beneath the door sill was installed incorrectly.
- Mechanical Damage: Dropped tools, heavy patio furniture, or structural settling can puncture or tear elastomeric coatings.
3. The Professional Fix: Step-by-Step
Patching a waterproof coating is usually a temporary band-aid. A permanent fix requires addressing the underlying structure and layering the defense system properly.
Immediate Structural Diagnostics Help
[ Top Wearing Coating ]  <- Finished surface with UV/slip resistance
  [ Base Waterproofing Membrane ] <- Multi-layer elastomeric fluid or fiberglass
    [ Metal Flashing / Lath ] <- Rigid transition zones & wall-to-deck joints
      [ Sound Plywood Substrate ] <- Replaced dry-rot framing & sloped joists
Step 1: Structural Remediation
Any wood affected by dry rot must be cut out and replaced. If the plywood substrate or the support joists are soft or sagging, new structurally sound timber must be sistered or replaced to prevent future shifting.
Step 2: Flashing & Prep
Install new heavy-gauge metal flashing at the wall-to-deck transitions (diato/metal flashing) and the deck edges. All joints must be sealed with high-performance polyurethane sealant.
Step 3: Membrane Re-application
Apply a professional-grade multi-layer waterproofing system (such as a fluid-applied polyurethane or a multi-stage cementitious coating). This includes a primer, a reinforced base coat, and a UV-resistant top-wearing surface to handle foot traffic.
⚠️ A Note on DIY vs. Professional Repairs
Second-story waterproofing is governed by strict local building codes (like California’s SB 721/SB 326 exterior elevated element requirements). Inexperienced patching often traps water inside the framing, accelerating wood rot rather than stopping it.
If you suspect a leak under your elevated walkway, acting early can save your framing. For a precise evaluation, contact the diagnostic techs at H&S Decking & Waterproofing to schedule a professional thermal or flood inspection.
Subject Matter Context
Core Pillar Connection: This technical guide is part of our Diagnostics & Repair series. For comprehensive execution and guaranteed results in Canyon Lake, review our official protocol: Deck Building & Construction.